Here is how I configured AI to manage my Proxmox VMs
Use the Model Context Protocol (MCP) to let an AI assistant manage your Proxmox virtual machines, and how I configured it step by step.
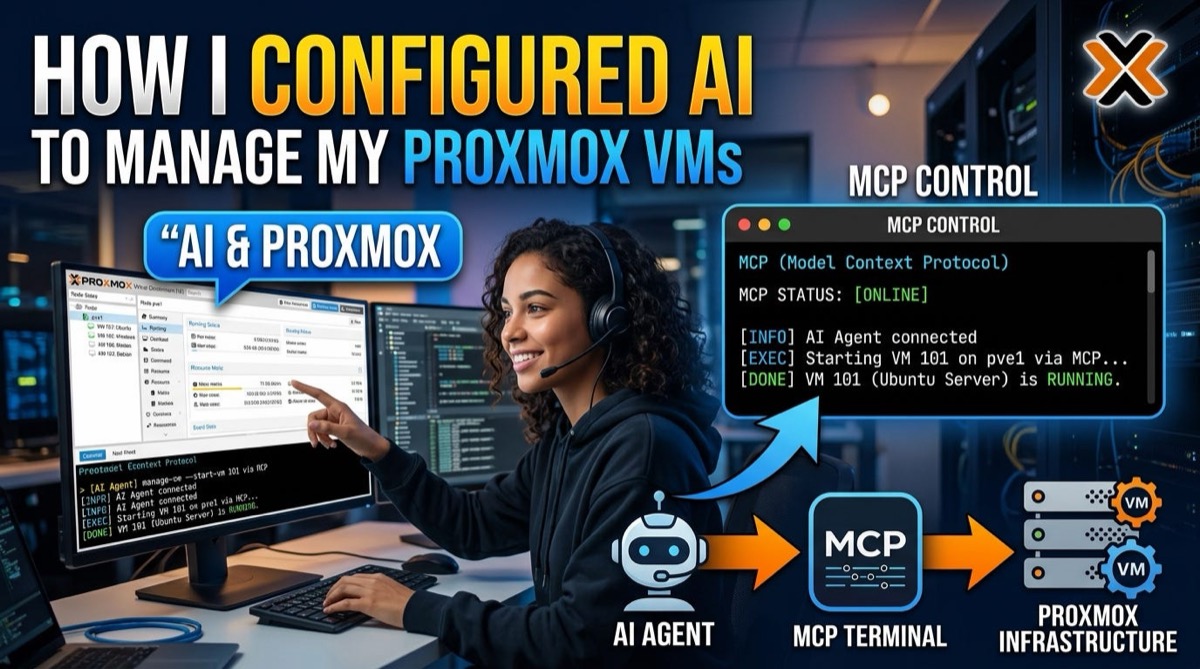
The Model Context Protocol (MCP) has fundamentally changed how LLMs interact with external infrastructure. Rather than serving as passive chatbots, AI models can now operate as autonomous system administrators. In this step-by-step guide, I will show you how to configure Proxmox VE and the Proxmox MCP Server in VS Code (or Claude Desktop) so GitHub Copilot (or Claude) can manage your Proxmox hypervisor and Virtual Machines natively using plain English prompts.
📋 Prerequisites:
Before getting started, make sure you have the following set up:
- VS Code (or your preferred editor with GitHub Copilot Agent mode / Claude Desktop).
- Bun Runtime (or Node.js) installed on your workstation or server (curl -fsSL https://bun.sh/install | bash).
- Proxmox VE Server (7.x / 8.x) with root or administrative access.
- Proxmox MCP Repository: github.com/amaialth/ProxmoxMCP (built with Bun & ElysiaJS).
Step 1: Generate Proxmox API Credentials:
To allow the MCP server to communicate with Proxmox securely without hardcoding password credentials, we will create a dedicated user and API token.
- Log into your Proxmox VE Web UI.
- Navigate to Datacenter ➔ Permissions ➔ Users.
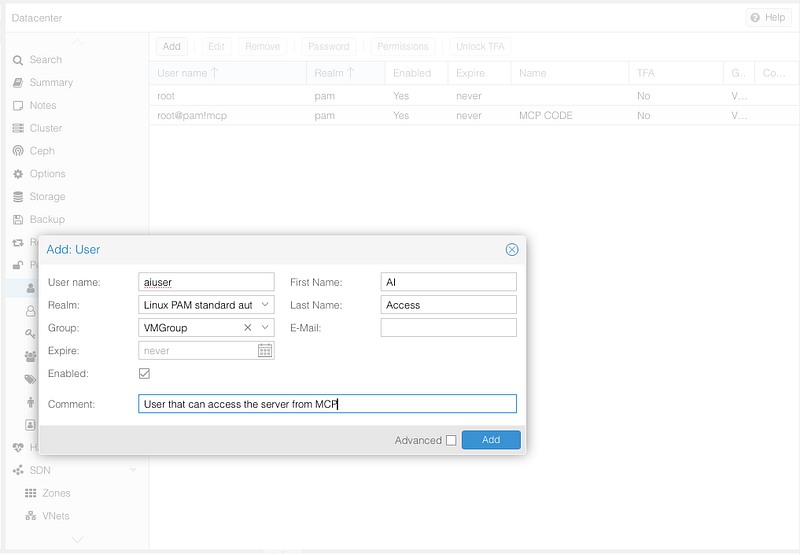
Create new user for MCP connection
3. Click Add and create a new user (e.g., `aiuser@pam`).
4. Navigate to Datacenter ➔ Permissions ➔ API Tokens.
5. Click Add to generate a new API token for `aiuser@pam` (e.g., Token ID: `mcp`). >
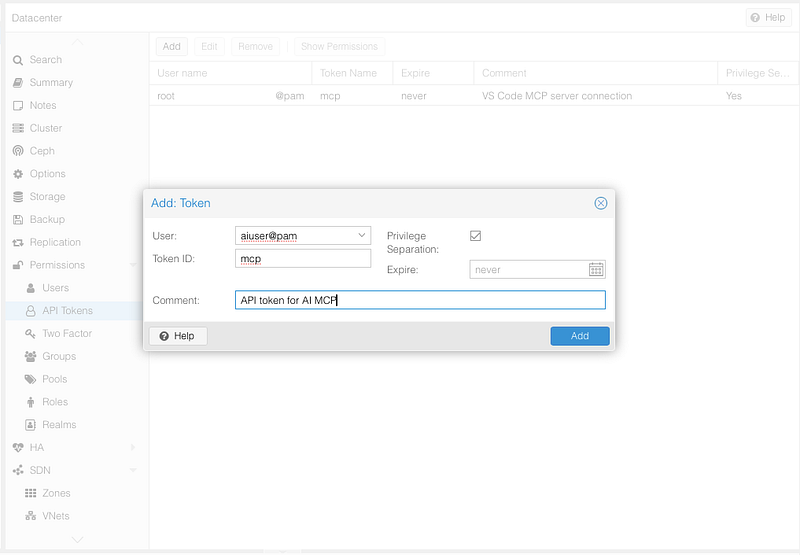
Creat the API Key
Copy the token
⚠️ Important: Copy the Secret Token Value immediately upon generation! Store it securely; Proxmox will not show this value again.
Step 2: Configure the MCP Server in VS Code
We will use the custom Bun + ElysiaJS MCP server (amaialth/ProxmoxMCP)
- Open VS Code in an empty directory or your project folder.
Open the Command Palette (`Ctrl+Shift+P` on Windows/Linux or `Cmd+Shift+P` on macOS) and search for MCP: Edit User Configuration (or open your `mcp.json` file).
- Add the following server definition to your configuration:
{
 "servers": {
 "proxmox": {
      "command": "bun",
      "args": ["run", "/path/to/ProxmoxMCP/src/index.ts"],
      "env": {
        "PROXMOX_HOST": "192.168.1.100",
        "PROXMOX_USER": "aiuser@pam!mcp",
        "PROXMOX_TOKEN_SECRET": "your-actual-api-token-secret-here",
        "PROXMOX_VERIFY_SSL": "false"
      }

    }
}
Update the server IP address, user, and API token secret with your actual environment details.
If you are running/deployed the Proxmox MCP then use below MCP configuration.
{
"servers":{
"proxmox": {
      "type": "http",
      "url": "https://<URL>"
    }
}
Save the file and start/reload the MCP server to ensure tools are automatically discovered by your AI environment.

MCP Tools
Step 3: Test Chat with AI
Head over to your AI chat sidebar (Copilot / Claude) and verify the connection status by asking a simple status query:
”Check the connection status of my Proxmox server and list all active nodes.”
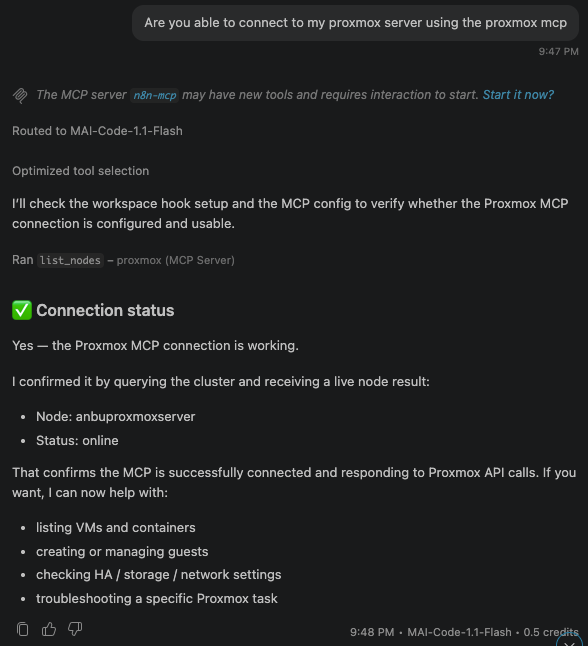
Chat with AI to check the connection.
Hurray! You have successfully connected your Proxmox server to the AI. The AI now has access to over 280+ tools to interact with the Proxmox server and manage your infrastructure.
Step 4: Grant VM Permissions to the API Token
In order to provide the AI access to specific Virtual Machines, you must assign permissions to the API key user on those VMs:
- In Proxmox VE, navigate to VM ➔ Permissions.
- Click Add ➔ API Token Permission.
- Select your API token (`aiuser@pam!mcp`) and assign a suitable role (e.g., `PVEVMAdmin` or appropriate custom permissions).
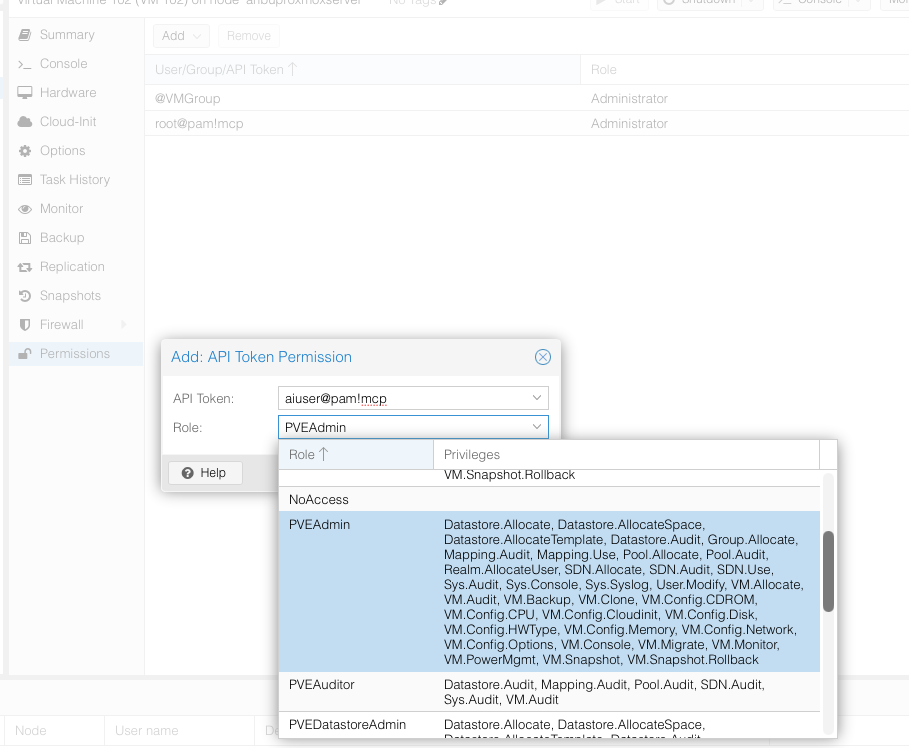
Adding API token to the VM
Return to your AI chat panel and test VM console and status access:
Check if you have console and status access to VM 100.
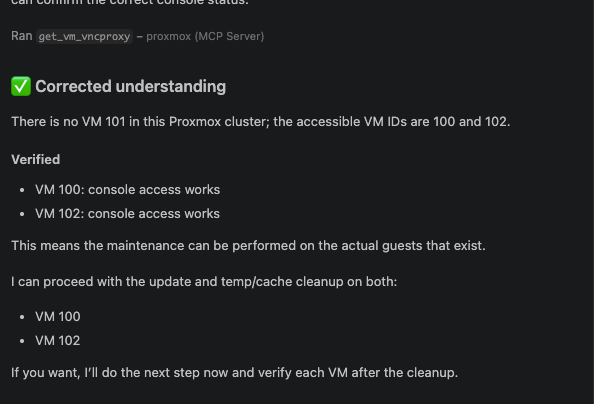
Confirming the console access is working fine.
The AI should respond confirming that console and status access are working properly!
Step 5 (Bonus): Enable Command Execution via QEMU Guest Agent
In order for the AI to execute commands directly inside a Linux Virtual Machine, you must enable the QEMU Guest Agent in Proxmox and start the service within the guest OS.
- Enable Guest Agent in Proxmox UI
- Navigate to VM ➔ Options ➔ QEMU Guest Agent ➔ Set to Enabled.
- Cold Reboot the VM (Stop and Start from Proxmox UI) for this hardware setting to take effect.
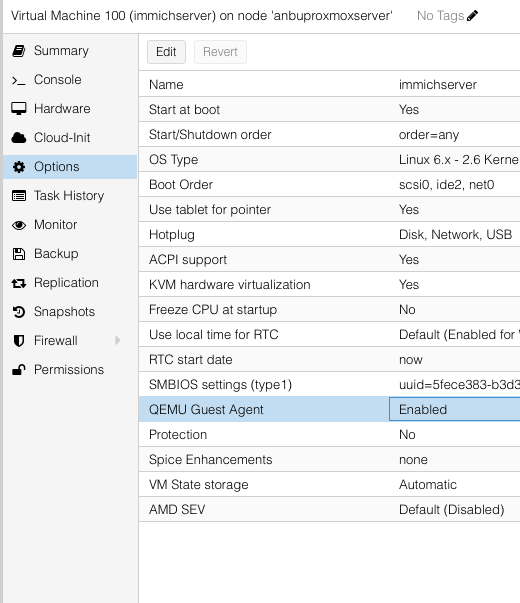
QEMU Guest Agent enabled
2. Enable & Start Guest Agent Inside Guest OS
Log into your target guest VM console and execute the commands for your distribution:
# Ubuntu / Debian
sudo apt update && sudo apt install qemu-guest-agent -y
sudo systemctl enable --now qemu-guest-agent

# RHEL / CentOS / AlmaLinux
sudo dnf install qemu-guest-agent -y
sudo systemctl enable --now qemu-guest-agent

# Start the guest agent
sudo systemctl start qemu-guest-agent
💡 Note*: Without an active QEMU Guest Agent running inside the VM, the AI cannot access the VM console to execute in-guest commands.*
🚀 Wrapping Up & Next Steps
From here, you can add your own custom AI Agents and automate complete VM management workflows.
For advanced automation, feel free to explore my companion agent repository:
- Proxmox MCP Server (Bun + Elysia): github.com/amaialth/ProxmoxMCP
- Proxmox Maintenance Agent & Skills: github.com/amaialth/ProxmoxAIAutomation
If you enjoyed this post, please leave a clap 👏 and star the GitHub repositories!
Get new articles by email
One short email whenever a new article is published. No spam, unsubscribe anytime.
Keep reading
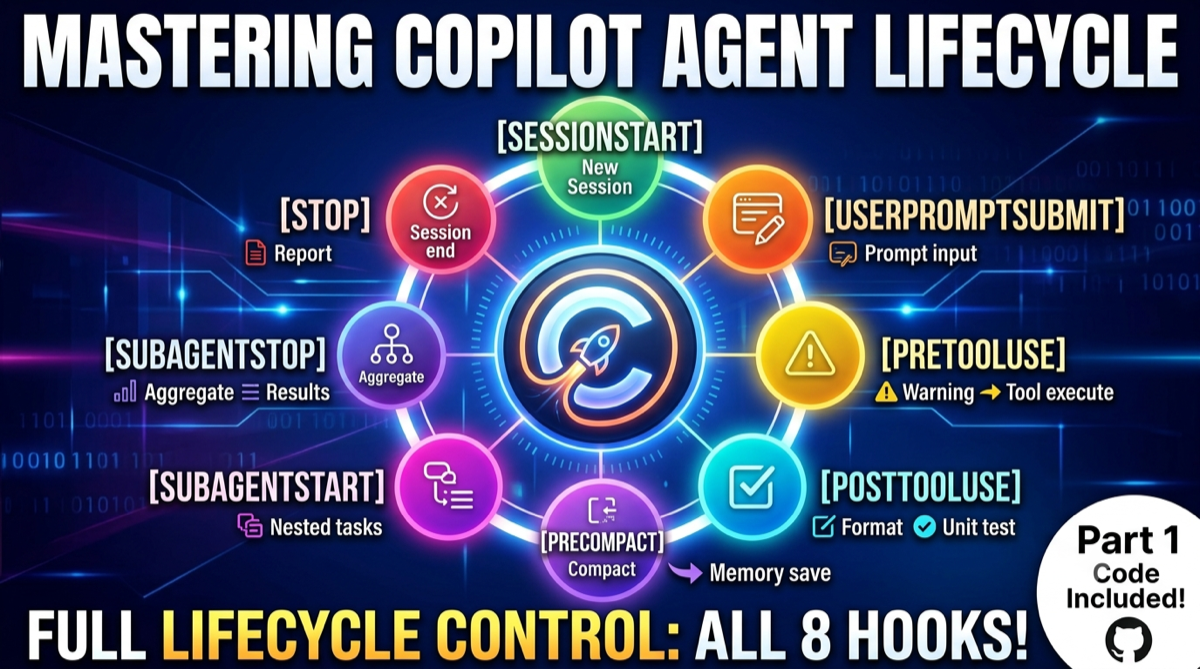
Mastering GitHub Copilot Agent Hooks: The Secret Middleware for Enterprise AI Workflows
How GitHub Copilot agent hooks work as middleware for enterprise AI workflows, helping you control response quality and context size.
Install n8n on AWS EC2 Ubuntu with Postgres Using Docker Compose and a Custom Domain
Install n8n on an AWS EC2 Ubuntu server with Postgres using Docker and Docker Compose, then host it on your own domain behind a reverse proxy.
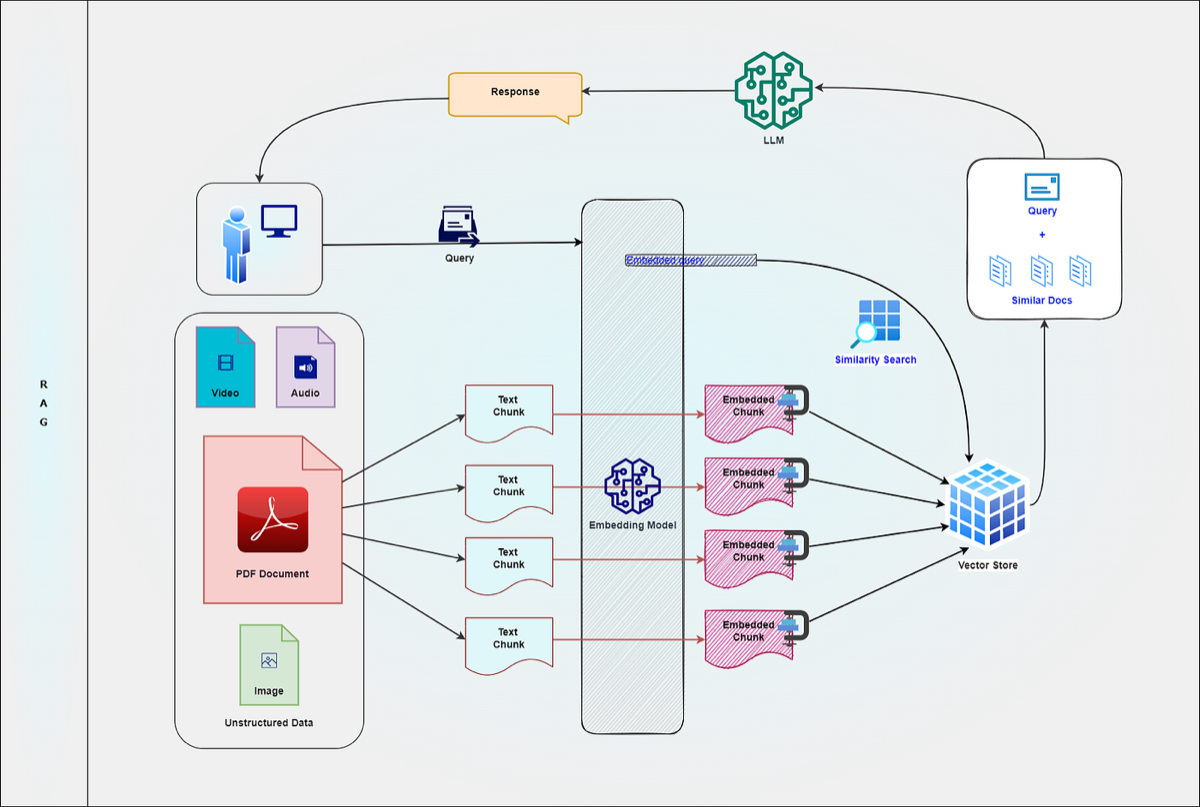
Create your Private RAG app with LLM (Ollama with Implementation)
Build a private Retrieval-Augmented Generation (RAG) app with a local LLM using Ollama and LangChain, with a working implementation.
Comments
No comments yet. Be the first to share your thoughts.