Install n8n on AWS EC2 Ubuntu with Postgres Using Docker Compose and a Custom Domain
Install n8n on an AWS EC2 Ubuntu server with Postgres using Docker and Docker Compose, then host it on your own domain behind a reverse proxy.
Welcome to another exiting topic on installing n8n on an EC2 Ubuntu instance, This is most reliably done using Docker and Docker Compose. This method ensures all dependencies are encapsulated and avoids conflicts with other software on your server.
Here is a step-by-step guide to install n8n on an EC2 Ubuntu instance using Docker.
Assuming you have created a EC2 instance with Ubuntu OS. Launch the instance and connect to the instance via SSH and follow below steps,
Step 1: Connect to Your EC2 Instance and Update Packages
Once connected, update your system’s package list and upgrade any existing packages.
sudo apt update && sudo apt upgrade -y
Step 2: Install Docker and Docker Compose
Docker is the containerization platform, and Docker Compose helps define and run multi-container applications.
# Install required packages to allow apt to use a repository over HTTPS
sudo apt install -y ca-certificates curl gnupg lsb-release

# Add Docker's official GPG key
sudo mkdir -p /etc/apt/keyrings
curl -fsSL https://download.docker.com/linux/ubuntu/gpg | sudo gpg --dearmor -o /etc/apt/keyrings/docker.gpg

# Set up the Docker repository
echo "deb [arch=$(dpkg --print-architecture) signed-by=/etc/apt/keyrings/docker.gpg] https://download.docker.com/linux/ubuntu $(lsb_release -cs) stable" | sudo tee /etc/apt/sources.list.d/docker.list > /dev/null

# Update the package list again to include Docker
sudo apt update

# Install Docker and the Docker Compose plugin
sudo apt install -y docker-ce docker-ce-cli containerd.io docker-buildx-plugin docker-compose-plugin
To run Docker commands without sudo, add your user to the docker group.
sudo usermod -aG docker $USER
-
$USER is a shell variable that automatically refers to your current username
(ubuntu). -
sudo usermod -aG dockerappends the user to thedockergroup.
Step 3: Create a Directory and Docker Compose File for n8n
Create a dedicated directory for your n8n files to keep everything organized.
mkdir n8n-docker
cd n8n-docker
You can directly clone the project to a new folder unsing belo command,
# Clone this repo into it using
git clone [repository-url] [new-folder-name]
If you wish to create the files manually follow below process for all the file exist in my n8n docker repo
Ceate a docker-compose.yml file. This file tells Docker how to run the n8n container, including its environment variables and volume mappings for persistent data. Use a text editor like nano to create the file.
nano docker-compose.yml
init-data.sh file: Your docker-compose.yml mounts a file ./init-data.sh to initialize the database. If this file doesn’t exist or has syntax errors, the container might fail during the startup process.
Save and exit the file (in nano, press Ctrl + X, then Y, then Enter).
Step 4: Configure EC2 Security Group
By default, an EC2 instance only allows traffic on port 22 (SSH). To access the n8n web interface, you need to allow incoming traffic on port 5678.
Navigate to your EC2 instance in the AWS Console.
-
Click on the Security tab.
-
Click on the Security group link associated with your instance.
-
In the Security Group details, go to the Inbound rules tab and click Edit inbound rules.
-
Click Add rule.
-
Set the type to Custom TCP and the port range to 5678.
-
Set the source to Anywhere IPv4 (0.0.0.0/0) or, for better security, restrict it to your specific IP address.
-
Click Save rules.
Step 5: Start n8n and Access the Web Interface
With the docker-compose.yml file created and the security group updated, you can now start n8n.
docker compose up -d
To check if n8n is running correctly, you can use:
docker ps
At this point you should see two docker process running
CONTAINER ID   IMAGE                     COMMAND                  CREATED        STATUS                  PORTS                                         NAMES
7cb0af4f5568   docker.n8n.io/n8nio/n8n   "tini -- /docker-ent…"   14 hours ago   Up 14 hours             0.0.0.0:5678->5678/tcp, [::]:5678->5678/tcp   n8n-docker-n8n-1
887b3fb65f84   postgres:16               "docker-entrypoint.s…"   14 hours ago   Up 14 hours (healthy)   5432/tcp                                      n8n-docker-postgres-1
Step 6: Access n8n using public IP/Elastic IP
6.1 Accessing via instance public IP
Public ip of the instance will change after a instance restart. First, you need to find the public IP address of your running EC2 instance.
-
Log in to the AWS Management Console.
-
Navigate to the EC2 dashboard.
-
In the left-hand navigation pane, click Instances.
-
Find your specific instance in the list.
-
In the details pane at the bottom, look for the Public IPv4 address. Copy this address
Use this ip address and append :5678 to acess the n8n editor.
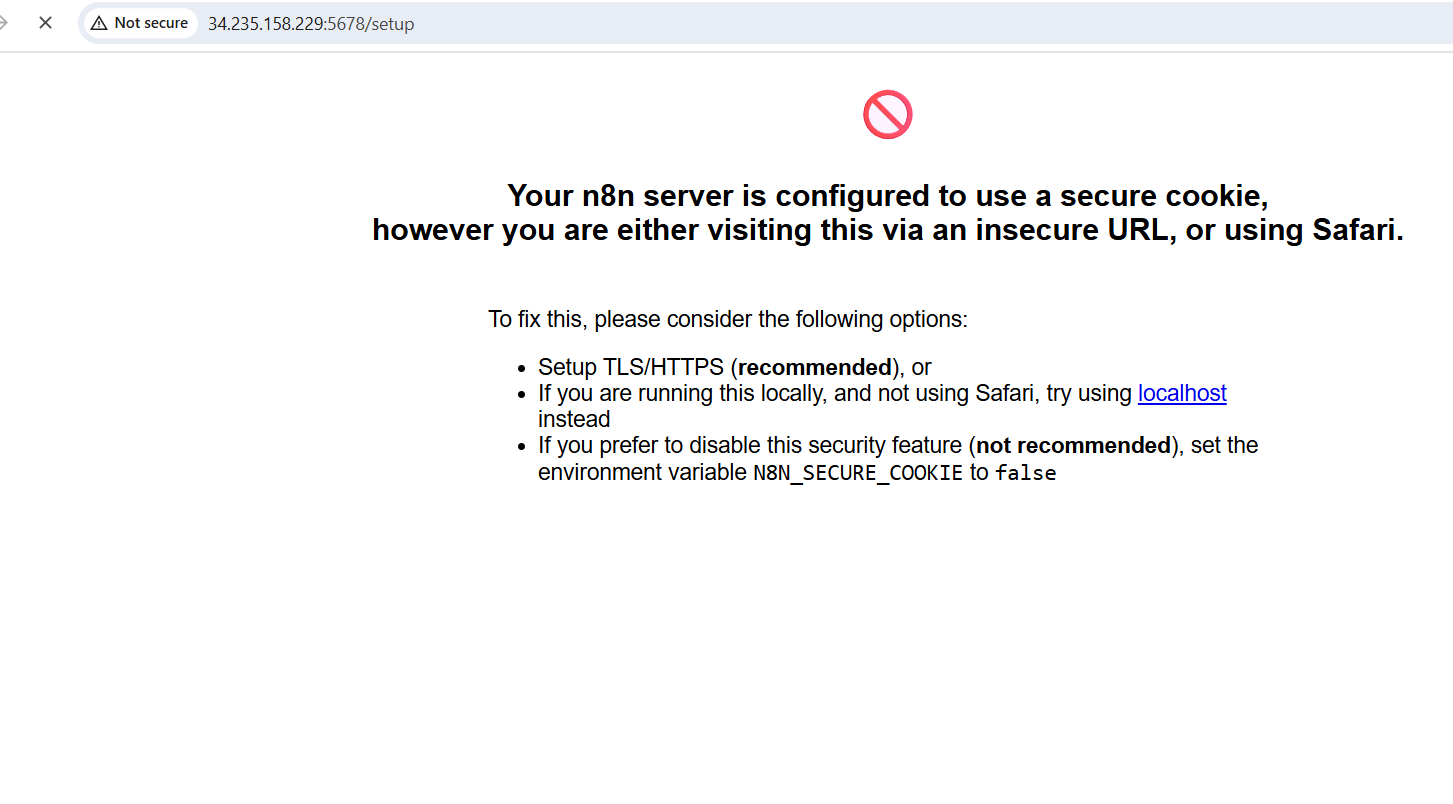
At this point you might see below error as the secure cookies are enabled for n8n. If you wish to diable please feel free to update your .env file and restart the container.
Step 7: Adding A record on DNS provider
Now that your instance is running and accessible via its public IP, you can connect it to your DNS by creating an A record that points your domain name to the instance’s public IP address.
Here is a general guide on how to do this, using the interface of your domain’s DNS provider.
Step 7.1: Obtain the EC2 Instance’s Public IP Address
First, you need the public IP address of your EC2 instance. You should already have this, as it’s what you used to access the instance directly. You can find it in the AWS Management Console under the EC2 dashboard.
Step 7.2: Access Your DNS Provider’s Settings
Log in to the control panel of your domain registrar or DNS hosting provider (e.g., GoDaddy, Namecheap, Route 53, Cloudflare). Look for a section related to DNS management, DNS records, or domain settings.
Step 7.3: Create an A Record
An A record maps a domain name to an IPv4 address. You will create a new A record with the following details:
- Type: Select
Afrom the record type dropdown. - Host/Name: This is the subdomain you want to use.
- To connect the root domain (e.g.,
example.com), enter@or leave this field blank. - To connect a subdomain (e.g.,
n8n.example.com), entern8n.
- To connect the root domain (e.g.,
- Value/Points to: Enter the Public IPv4 address of your EC2 instance.
- TTL (Time-To-Live): This is how long DNS resolvers should cache the record. A lower value (e.g., 300 seconds or 5 minutes) is good for initial setup, as it allows for quicker updates.
Step 7.4: Add a CNAME Record (Optional)
You may also want to set up a CNAME record to handle the www subdomain, which points to your root domain.
- Type:
CNAME - Host/Name:
www - Value/Points to: The root domain (e.g.,
example.com).
Step 5: Wait for DNS Propagation
After saving the records, you need to wait for the changes to propagate across the internet. This process, known as DNS propagation, can take anywhere from a few minutes to up to 48 hours, although it’s usually much faster. You can use a tool like What’s My DNS? to check the propagation status.
Once propagation is complete, your domain name will resolve to your EC2 instance’s IP address, and you can access your application via your custom domain.
Step 8: Installing Ngnix Proxy Manager
Create a dedicated directory for your ngnix files to keep everything organized.
mkdir ngnix-docker
cd ngnix-docker
You can directly clone the project to a new folder unsing below command,
# Clone this repo into it using
git clone https://github.com/amaialth/ngnix_docker.git [new-folder-name]
If you wish to create the files manually follow below process for all the file exist in my n8n docker repo
Step 8.1: Update EC2 Security Group
As ngNix admin console runs on port 81. We need to update the security group to allow port 81.
Navigate to your EC2 instance in the AWS Console.
-
Click on the Security tab.
-
Click on the Security group link associated with your instance.
-
In the Security Group details, go to the Inbound rules tab and click Edit inbound rules.
-
Click Add rule.
-
Set the type to Custom TCP and the port range to 81.
-
Set the source to Anywhere IPv4 (0.0.0.0/0) or, for better security, restrict it to your specific IP address.
-
Click Save rules.
Step 9: Start Ngnix and Access the Web Interface
With the docker-compose.yml file created and the security group updated, you can now start n8n.
docker compose up -d
To check if n8n is running correctly, you can use:
docker ps
At this point you should see two docker process running
CONTAINER ID   IMAGE                             COMMAND                  CREATED        STATUS                    PORTS                                                                                      NAMES
83450c9ed3b3   docker.n8n.io/n8nio/n8n           "tini -- /docker-ent…"   21 hours ago   Up 28 minutes             0.0.0.0:5678->5678/tcp, [::]:5678->5678/tcp                                                n8n-docker-n8n-1
26009b920ac8   postgres:16                       "docker-entrypoint.s…"   21 hours ago   Up 28 minutes (healthy)   5432/tcp                                                                                   n8n-docker-postgres-1
8e95c8579319   jc21/nginx-proxy-manager:latest   "/init"                  2 days ago     Up 28 minutes             0.0.0.0:80-81->80-81/tcp, [::]:80-81->80-81/tcp, 0.0.0.0:443->443/tcp, [::]:443->443/tcp   ngnix-ngnix-1
87939f65e156   jc21/mariadb-aria:latest          "/scripts/run.sh"        2 days ago     Up 28 minutes             3306/tcp                                                                                   ngnix-db-1
This shows all the process running on the EC2 instance. Navigate to your custom domain via http on port 81(eg. n8n.example.com:81)
Step 10: Configure Proxy Host to access n8n via Custom DNS
After login to Ngnix procy manager.
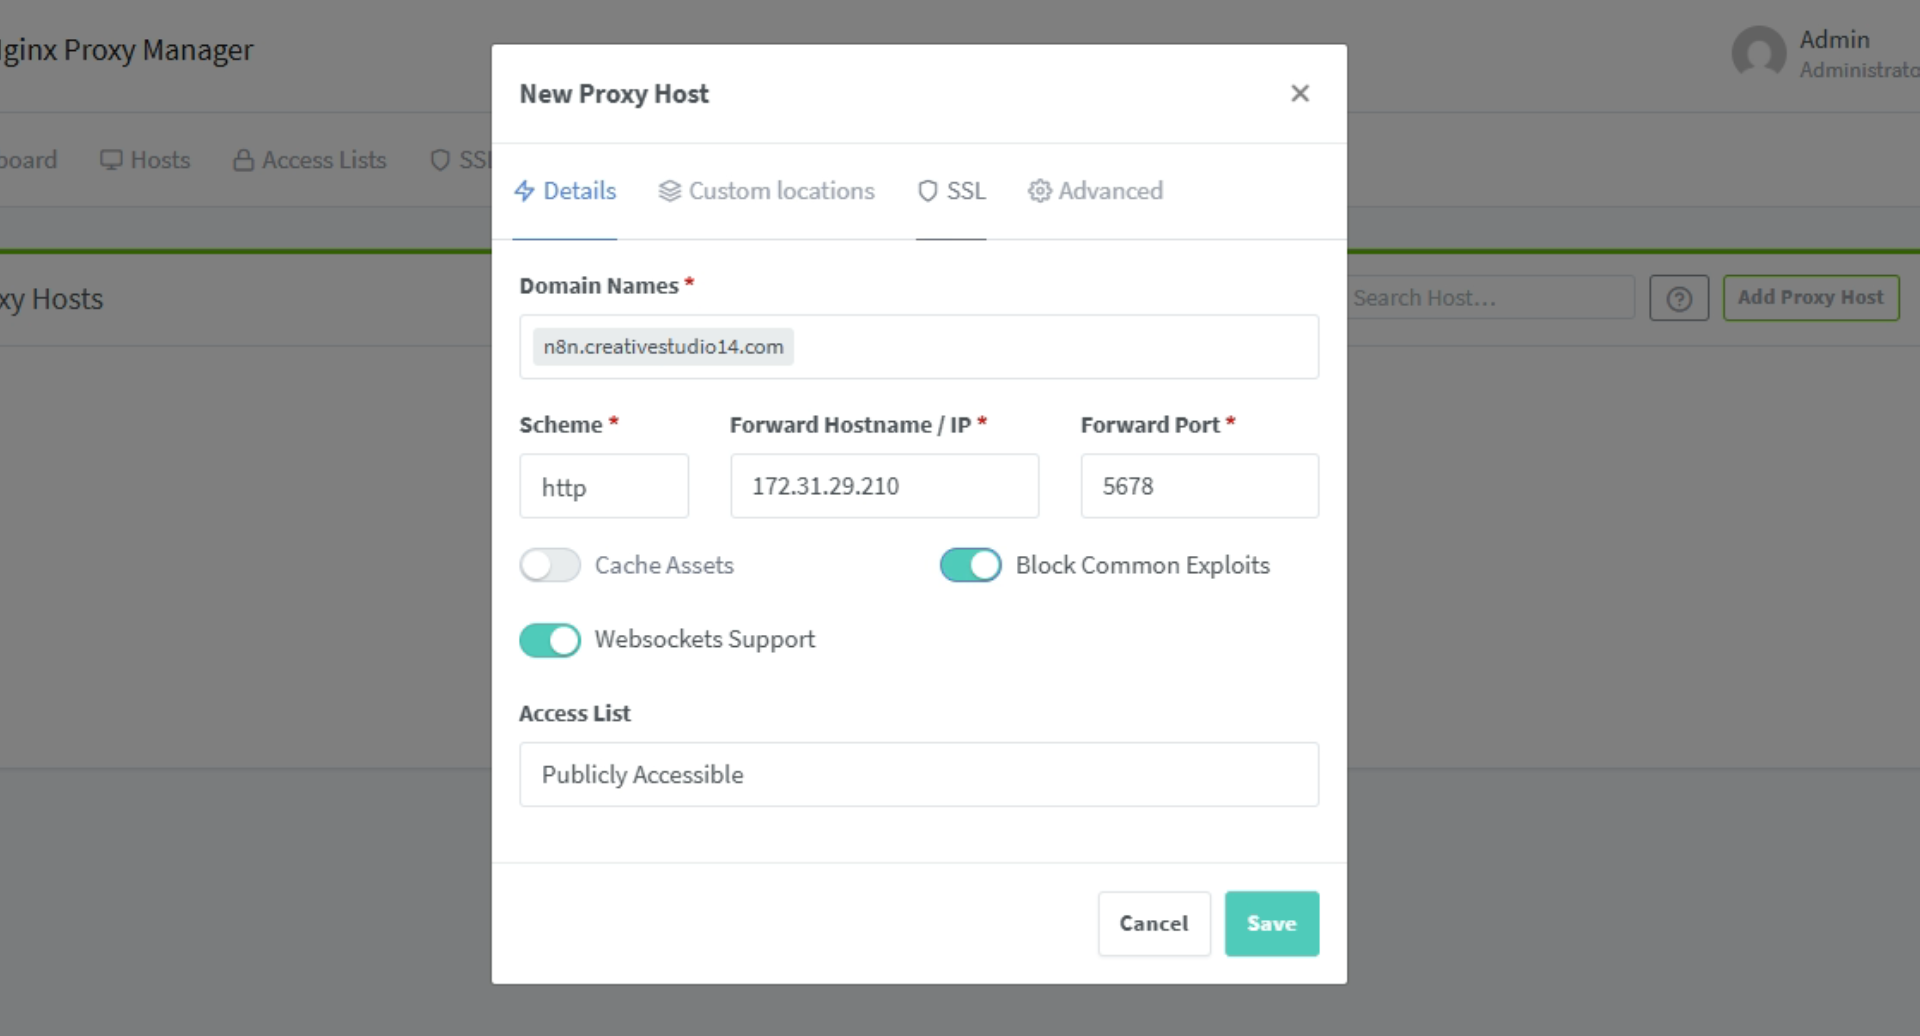
- Click on add Proxy Host
- Add your domain name.
- You can get the private ip from the EC2 instance and add it to the forwarded host/ip and the port to 5678.
- Enable Websocket Support.
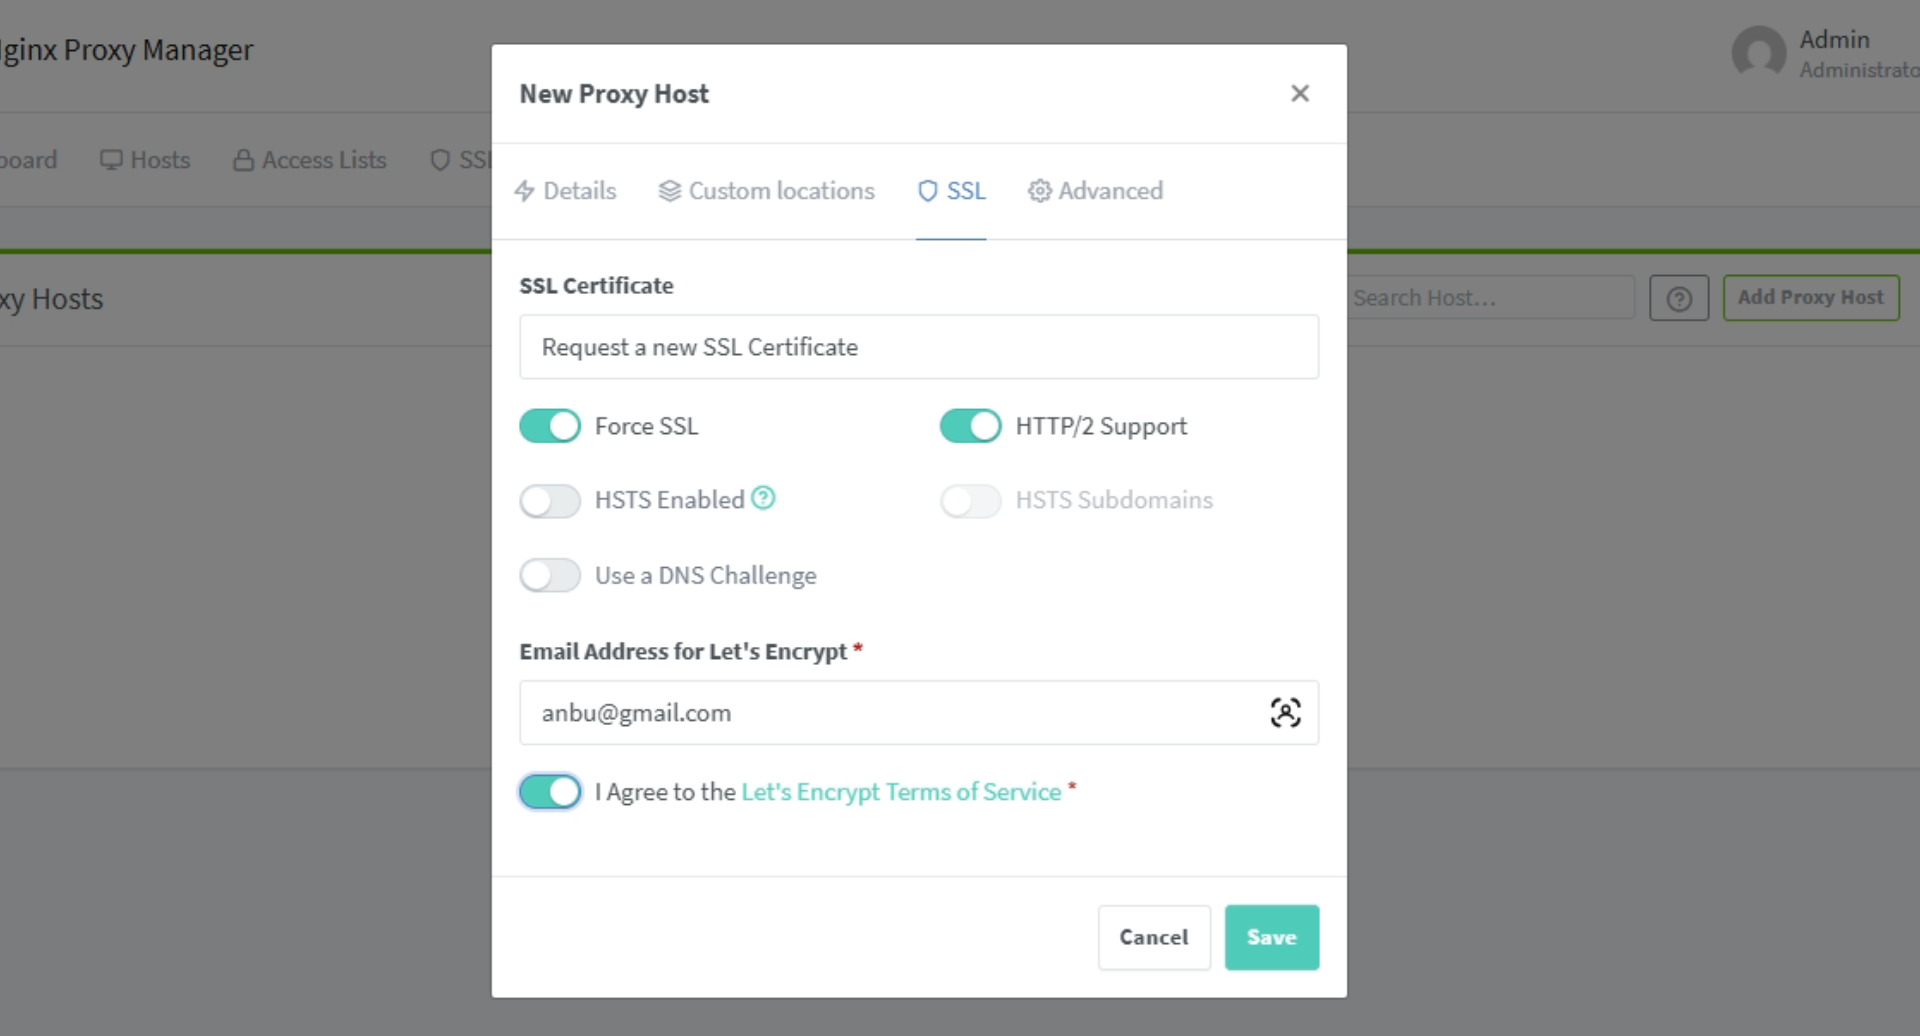
Move to SSL tab
- Select Request a new SSL Certificate
- Select Force SSL and HTTP/2 Support
- Agree to the terms and Click on Save.
At this point you are all set to access the n8n.example.com
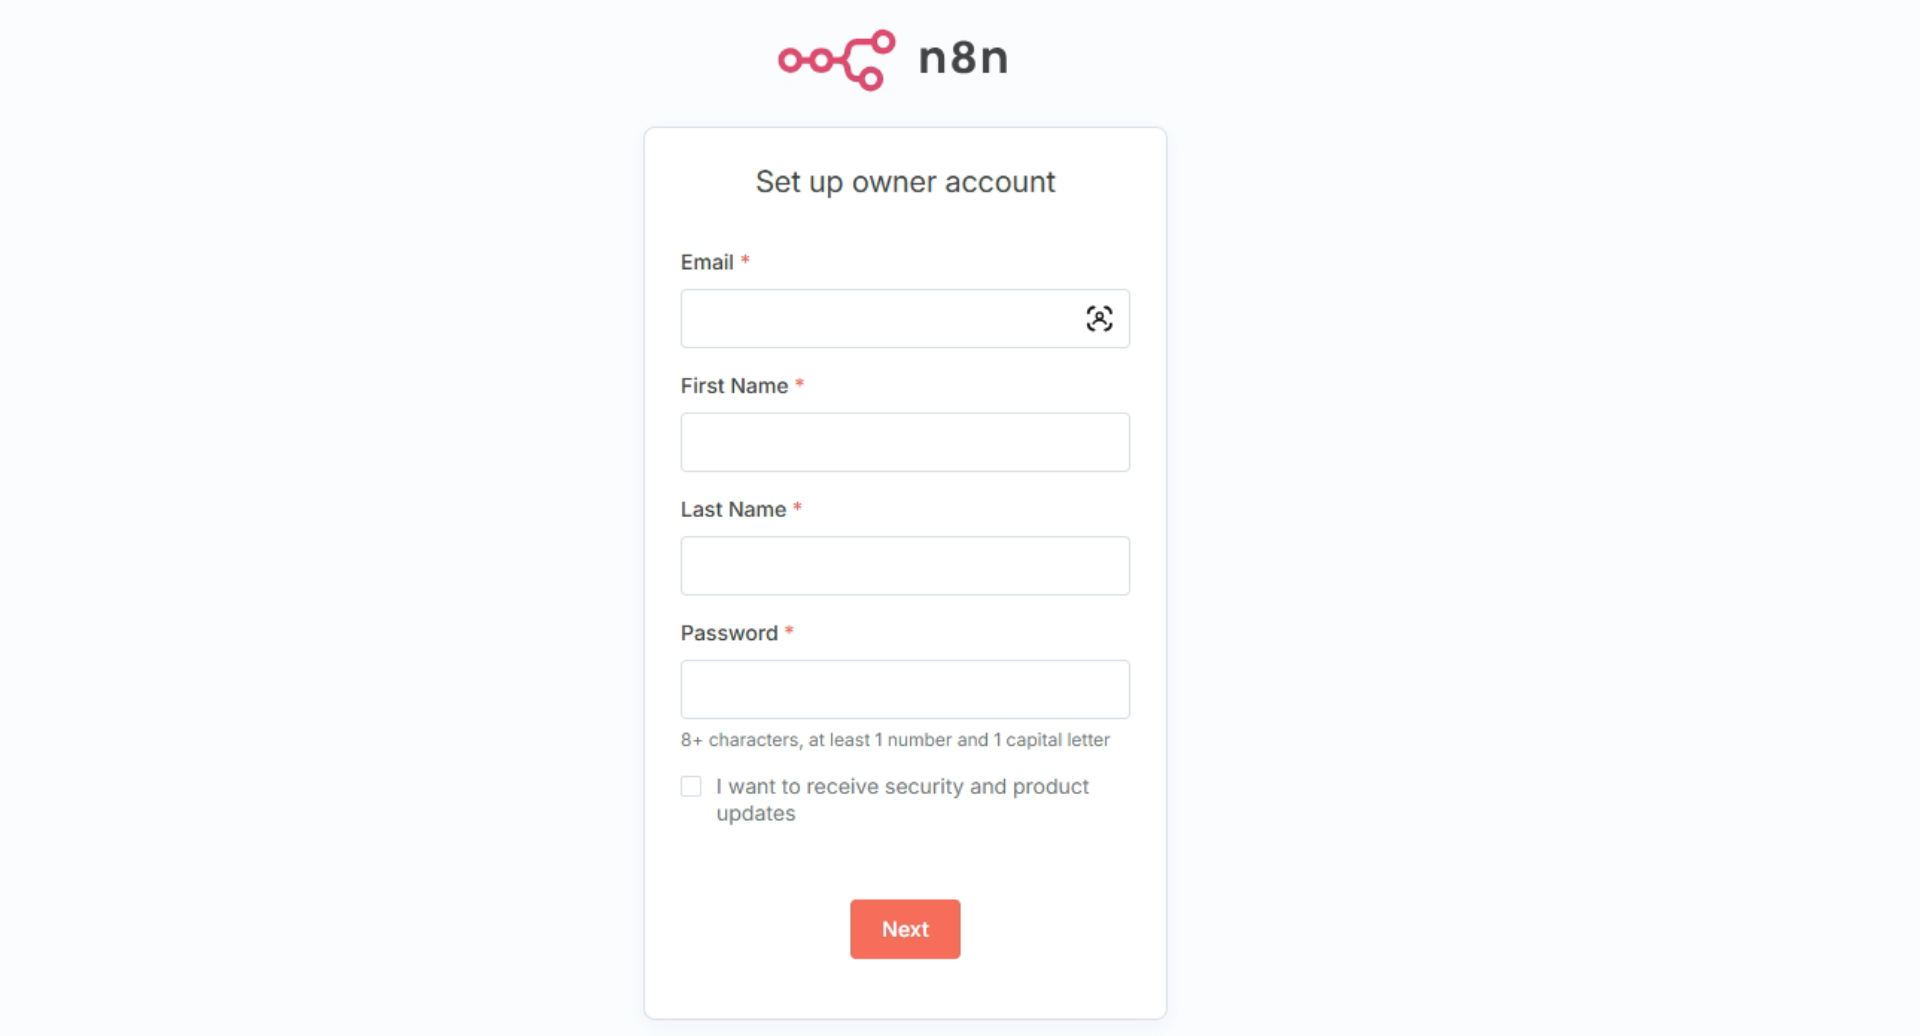
Hope this blog helped you to self-host n8n. Thanks for reading my blog. If you have any questions. Email me on anbuathypathy@gmail.com all your questions and comments.
Get new articles by email
One short email whenever a new article is published. No spam, unsubscribe anytime.
Keep reading
Spring Boot — Continuous Deployment from GitHub into GCP Cloud Run with Cloud Build
Set up continuous deployment for a Spring Boot app: GitHub as the code repository, Google Cloud Build to build the image and Cloud Run to run it.
Comments
No comments yet. Be the first to share your thoughts.